close
Choose Your Site
Global
Social Media


Views: 0 Author: Site Editor Publish Time: 2026-02-25 Origin: Site


Tip: Most quick connect leaks do not mean you need to replace the whole system. You can solve the problem with a few easy steps.
Check O-rings often. Broken O-rings can make leaks happen. Change them when you do maintenance to stop problems.
Keep connections clean. Dirt can block seals and cause leaks. Clean the fittings and flush the ports before you use them.
Install the parts the right way. Make sure tubing fits well and follow the steps. If you install it wrong, there can be gaps and leaks.
Use good fittings. Pick fittings that fit your system. Good parts last longer and help stop leaks.
Do regular maintenance for quick connects. Checking and cleaning often helps find problems early. This keeps your system working well.
If you see a quick connect leaking, you might wonder why. Many people who fix things at home have this problem. You can stop most leaks if you know what causes them. Here are some main reasons why quick connects leak:
O-rings help seal the fitting inside. If water is around your flush port, the O-rings might be damaged. These rubber rings can get old, flat, or cracked over time. When this happens, water can leak out. Checking them often helps you find problems early. If you notice a leak, look at the O-rings first.
Note: Bad O-rings are a common reason for leaks. Check them when you do regular maintenance.
Dirt, dust, or small metal pieces can get inside quick connects. These things stop the seal from working and let water leak. Debris can get in when you change parts, take off hoses, or leave the flush port open. Dust and moisture in the air can also land on the connection if you keep parts in a dirty place.
Common debris sources:
Dirt or metal pieces inside
Stuff from changing hoses
Dust and moisture in the air
Keep your flush port and fittings clean to stop leaks.
Leaks often happen if you install things wrong. If the tubing size does not match the fitting, there can be gaps. Forcing the parts together or bending the tubing can also make leaks. Tightening too much can hurt the fitting or O-ring. Always follow the instructions and use the right tools.
Common mistakes:
Wrong tubing size
Bending at weird angles
Tightening too much or too little
Putting rings or sleeves in the wrong spot
Tubing that is worn out, uneven, or cut badly will not seal well. Erosion can come from bad water, heat changes, or shaking. If the tubing does not fit tight, water will leak. Check the tubing for cracks, rough spots, or damage.
Factor | Description |
|---|---|
Material and design of the hose | Changes how well the hose fits the fitting. |
Compatibility of the hose bore | Makes sure the fit is good for sealing. |
Correct selection and installation of clamp | Affects how tight and strong the seal is. |
Mechanical factors (pressure, temperature, vibration) | Can make leaks worse if tubing is worn or uneven. |
Not all quick connects are made the same way. If you use fittings that do not match or are cheap, leaks can happen. Fittings that do not match may not seal right. Cheap parts might not handle water pressure or last long.
Risk Type | Description |
|---|---|
Potential Leaks | Fittings that do not match can cause leaks. |
Pressure Handling Failure | Cheap fittings might break with normal water pressure. |
Safety Concerns | Bad fittings can sometimes be unsafe. |
Tip: Pick fittings that fit your system and meet the rules.
If you use these tips, you can find out why most leaks happen. Quick connects work best when you use the right parts and put them in the right way.
When you find a leaking quick connect, you can fix it with the right steps. Each cause has its own solution. Use these troubleshooting tips to stop leaks and keep your system working well.
O-rings seal the connection inside your quick connect fitting. Worn o-rings often cause leaks. You should change them during regular maintenance or when you see a leak.
Steps to replace O-rings:
Depressurize the system. Always release pressure before you start. Wear safety glasses to protect your eyes.
Disconnect the coupler halves. Follow your manual to avoid damage.
Remove the damaged O-ring with a pick tool. Clean the groove so no dirt remains.
Inspect the new O-ring for cracks or defects. Lubricate it with a compatible fluid.
Insert the new backup ring, then place the new O-ring in the groove. Make sure it sits flat and lines up correctly.
Reconnect the coupler halves. Tighten the connection and check for leaks.
Tip: Do not scratch or break the O-ring during installation. Place it carefully to avoid leaks.
Common Mistakes | Description |
|---|---|
Improper Installation | Placing the O-ring wrong can cause leaks. |
Damaged O-rings | Scratches or breaks stop a watertight seal. |
Poor Fit or Alignment | Dirt or mismatched parts lead to leakage. |
Debris in the connection can block the seal and cause a leaking quick connect. You should check for dirt, sand, or dried chemicals before every job.
Tools for cleaning:
Cleaning Tool/Agent | Description |
|---|---|
Fiber Cleaning Kit | Includes tools and fluids for cleaning connectors. |
Fiber Wipes | Wipes for cleaning surfaces without damage. |
Debris Destroyer | Cleaning fluid that removes debris from connectors. |
How to clean:
Inspect the flush port and fittings for dirt or buildup.
Use a cleaning kit or fiber wipes to remove debris.
Repeat cleaning until the connection looks clear.
Reassemble and check for leaks.
Note: Regular cleaning helps prevent leaks and keeps your quick connects working longer.
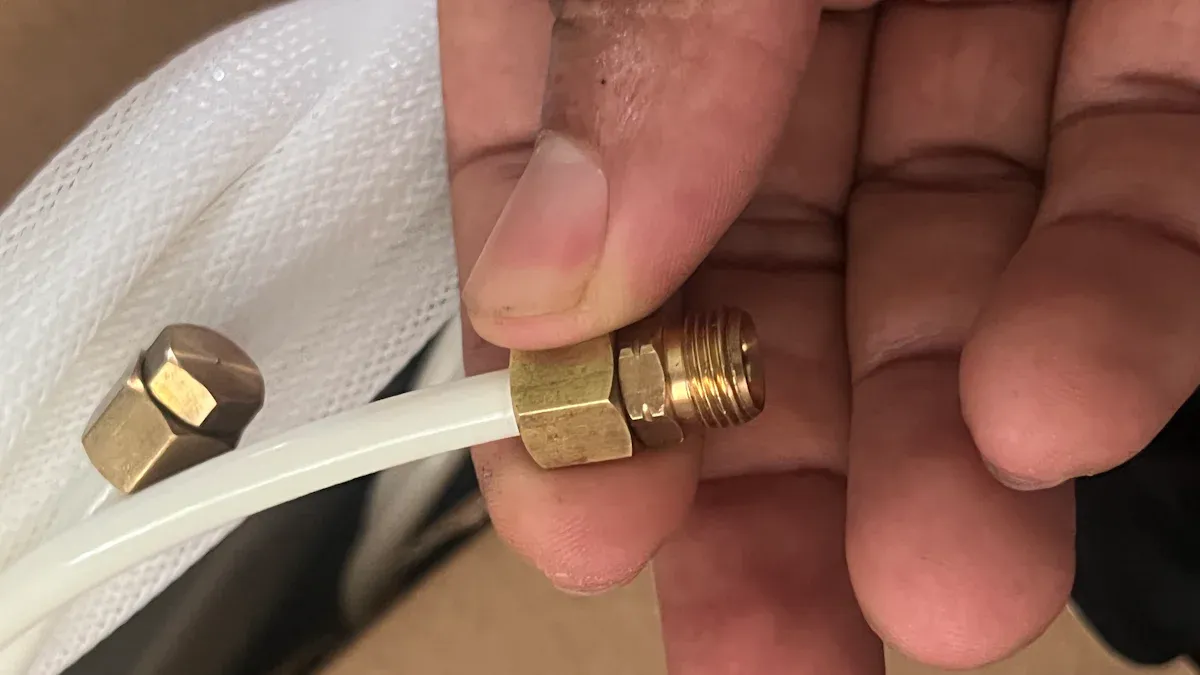
Proper installation stops leaks before they start. You need to make sure the tubing fits well and sits in the right spot.
Steps for correct installation:
Cut the tubing straight and clean. Use a sharp tool for a smooth edge.
Measure 3/8 inch from the tubing end. Mark it with a ruler.
Push the tubing into the fitting until the mark disappears under the collet.
Wet the tubing if needed. This helps it slide in easily.
Check that the tubing reaches the O-ring for a tight seal.
Callout: Always check the fit before turning on the water. A loose tube can cause a leaking quick connect.
Eroded or uneven tubing cannot seal well. You should repair or replace tubing if you see cracks, rough spots, or damage.
Make sure the outer diameter matches the fitting size.
Cut the tubing clean and straight.
Test the fit before connecting. The tube should not wiggle or feel loose.
If the tubing does not fit, replace it with a new piece. This prevents leaks and keeps your system safe.
Using the right fittings stops leaks. Mismatched or low-quality parts can fail under pressure.
Choose fittings that match your system size and type.
Avoid cheap parts that may not last.
Check for safety ratings and compatibility.
Tip: High-quality fittings handle water pressure better and last longer.
By following these steps, you can fix most leaking quick connect problems. Regular checks and good installation keep your flush port and fittings in top shape.
You can stop most leaks before they start by following regular maintenance tips. Check your quick connects and flush port for signs of water leaking. Clean the fittings and tubing often. Look for cracks, worn O-rings, or dirt that could block the seal. Replace any damaged parts right away. When you keep your system clean and check it often, you help it last longer and work better.
Tip: Make a simple checklist for your maintenance routine. This helps you remember each step and keeps your system safe.
You should always pick high-quality fittings for your system. These fittings use better sealing designs that keep water from leaking. They last longer and do not need to be replaced as often. High-quality quick connects also help your system run safely and smoothly. When you use good parts, you save money on repairs and avoid downtime. You also protect the environment by stopping leaks before they cause problems.
Cutting tubing the right way helps you get a tight seal. Follow these steps for the best results:
Use a tube cutter to make a clean cut.
Place the tubing between the rollers and the cutting wheel.
Turn the handle until the wheel touches the tube, then tighten a little more.
Spin the cutter around the tube, tightening after every second turn.
If you do not have a tube cutter, use a hacksaw, but the cut may not be as smooth.
Remove any burrs with a deburring tool to keep the fit tight and prevent damage.
A clean, straight cut helps the tubing fit well and stops leaks. Always check the fit before you finish the job.
You need to use the right amount of force when you connect fittings. Too much torque can damage the seal and cause leaks. Each fitting has its own torque setting. Check the manufacturer's guide for the correct value. Use a torque wrench if you have one. This helps you avoid over-tightening or under-tightening. Proper torque keeps your connection secure and leak-free.
Note: Taking time to install fittings the right way helps you avoid water leaking and keeps your system safe.
You can stop most quick connect leaks if you know what causes them and fix them fast. Leaks often happen because of bad O-rings, dirt, mistakes when putting parts together, or fittings that do not match. If you check your plumbing often and put things in the right way, it will work well.
Checking your system often helps you find problems early.
Doing maintenance every year can help you avoid big problems and high costs.
Fix leaks right away when you see them. Most leaks are easy to fix, so you can keep your system working well if you follow these steps.
You may have missed hidden damage or dirt. Check the O-ring and tubing again. Make sure you use the right size parts. Clean everything before you reconnect.
No. You need the correct size and material. Using the wrong O-ring can cause leaks or damage. Always match the O-ring to your fitting.
You should check your quick connects every few months. Look for leaks, cracks, or dirt. Regular checks help you catch problems early.
Tube cutter
Pick tool for O-rings
Cleaning wipes
Ruler or marker
These tools help you cut, clean, and replace parts easily.
No. Leaks can cause water damage or system failure. Fix leaks right away to keep your system safe.


